
In this article, will see how to create GridView with custom adapter in android. As name suggests, GridView helps you to populate data in two-dimensional and scrollable grid. All the grid items are automatically inserted into the layout using an adapter. We will be using BaseAdapter to display the content into our GridView.
Steps and Source Code for implementing Custom GridView with adapter –
– First Create a new Project CustomGridViewExample.
– Create an empty activity i.e MainActivity.
– Now add GridView to your Activity layout file
activity_main.xml file:
<?xml version="1.0" encoding="utf-8"?>
<RelativeLayout xmlns:android="http://schemas.android.com/apk/res/android"
xmlns:app="http://schemas.android.com/apk/res-auto"
xmlns:tools="http://schemas.android.com/tools"
android:layout_width="match_parent"
android:layout_height="match_parent"
tools:context="com.test.gridview.MainActivity">

<GridView
android:id="@+id/griview"
android:numColumns="auto_fit"
android:gravity="center"
android:columnWidth="100dp"
android:layout_width="match_parent"
android:layout_height="match_parent"/>

</RelativeLayout>
– Next step is to create a custom layout file to format how a single column will look in our GridView.
– Right click on the layout folder, New and then click on Layout resource file and name it to single_item.xml
single_item.xml file:
<?xml version="1.0" encoding="utf-8"?>
<LinearLayout xmlns:android="http://schemas.android.com/apk/res/android"
android:orientation="vertical" android:layout_width="match_parent"
android:layout_height="match_parent"
android:padding="8dp"
android:gravity="center">

<ImageView
android:id="@+id/imageview"
android:layout_width="60dp"
android:layout_height="60dp" />

<TextView
android:id="@+id/textview"
android:gravity="center"
android:layout_width="wrap_content"
android:layout_height="wrap_content" />

</LinearLayout>
– Now we need an adapter to populate data into GridView.
– Right click on package folder i.e in my case com.sanktips.customgridviewexample, New and then click on java class.
– Name the class as GridAdapter and extend it with BaseAdapter.
– Now create a constructor for the class and all overriding methods as given below.
GridAdapter.java file:
package com.sanktips.customgridviewexample;

import android.content.Context;
import android.view.LayoutInflater;
import android.view.View;
import android.view.ViewGroup;
import android.widget.BaseAdapter;
import android.widget.ImageView;
import android.widget.TextView;
import android.widget.Toast;


public class GridAdapter extends BaseAdapter {

    Context context;
    private final String [] values;
    private final int [] images;
    LayoutInflater layoutInflater;

    public GridAdapter(Context context, String[] values, int[] images) {
        this.context = context;
        this.values = values;
        this.images = images;
    }

    @Override
    public int getCount() {
        return values.length;
    }

    @Override
    public Object getItem(int position) {
        return null;
    }

    @Override
    public long getItemId(int position) {
        return 0;
    }

    @Override
    public View getView(final int position, View convertView, ViewGroup parent) {

        layoutInflater = (LayoutInflater) context.getSystemService(Context.LAYOUT_INFLATER_SERVICE);


        Holder holder = new Holder();
        View rowView;

        rowView = layoutInflater.inflate(R.layout.single_item, null);
        holder.tv =( TextView) rowView.findViewById(R.id.textview);
        holder.img = (ImageView) rowView.findViewById(R.id.imageview);

        holder.tv.setText(values[position]);
        holder.img.setImageResource(images[position]);

        rowView.setOnClickListener(new View.OnClickListener() {
            @Override
            public void onClick(View view) {

                Toast.makeText(context, "You Clicked "+values[position], Toast.LENGTH_LONG).show();

            }
        });

        return rowView;
    }

    public class Holder
    {
        TextView tv;
        ImageView img;
    }

}
– Then we will create two Arrays for String Values and int images to populate it into GridView by setting up the adpater in our MainActivity.
MainActivity.java file:
package com.sanktips.customgridviewexample;
import android.support.v7.app.AppCompatActivity;
import android.os.Bundle;
import android.widget.GridView;
public class MainActivity extends AppCompatActivity {
GridView gridView;
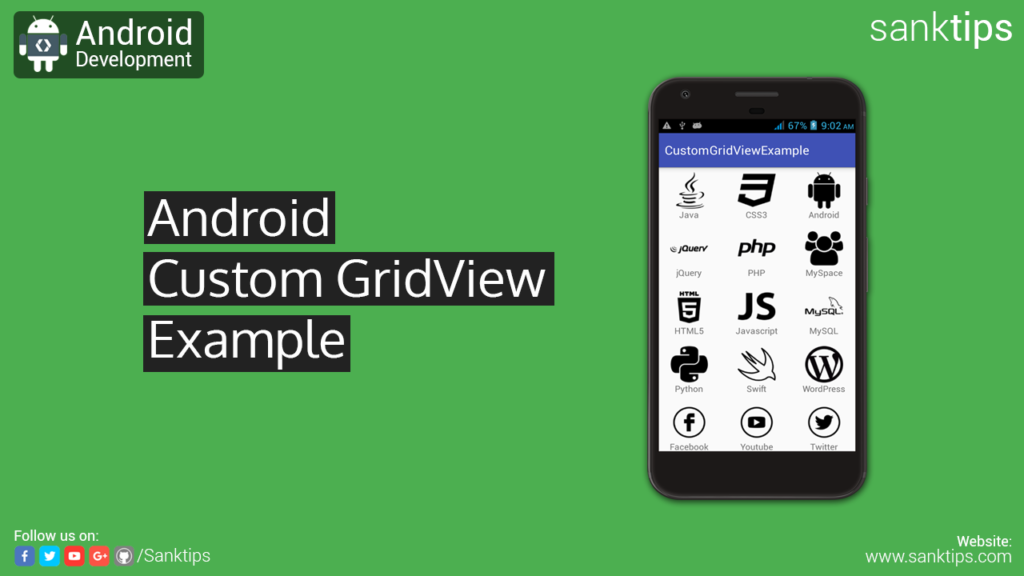
String[] values = {
"Java", "CSS3", "Android", "jQuery", "PHP", "MySpace",
"HTML5", "Javascript", "MySQL", "Python", "Swift",
"WordPress", "Facebook", "Youtube", "Twitter"
} ;
int[] images = {
R.drawable.image1, R.drawable.image2, R.drawable.image3, R.drawable.image4,
R.drawable.image5, R.drawable.image6, R.drawable.image7, R.drawable.image8,
R.drawable.image9, R.drawable.image10, R.drawable.image11, R.drawable.image12,
R.drawable.image13, R.drawable.image14, R.drawable.image15
};
@Override
protected void onCreate(Bundle savedInstanceState) {
super.onCreate(savedInstanceState);
setContentView(R.layout.activity_main);
gridView = (GridView) findViewById(R.id.griview);
GridAdapter gridAdapter = new GridAdapter(this, values, images);
gridView.setAdapter(gridAdapter);
}
}
– So, finally we are done with implementing Custom GridView. Run your project to see the results.
Hope you find this article helpful. Join us on Facebook, Twitter and Google+ to get more updates on Android Development Tutorials.