
In this article, will see how to implement NumberPicker in our Android Project. This widget enables the user to select a number from a predefined range.
NumberPicker can be used in two ways i.e. select as a number or string value. While working with numbers, setMinValue() and setMaxValue() methods are used and with string value we use string array to add value to NumberPicker, setDisplayedValues() method helps to display values in NumberPicker.
setWrapSelectorWheel() method is used to show the selector wheel during flinging/scrolling should wrap around the getMinValue() and getMaxValue() values.
NumberPicker has a callback listener i.e. setOnValueChangedListener(), that help to notify user the changes happened in NumberPicker. While implementing setOnValueChangedListener(), we also need to implement onValueChange() method. onValueChange() helps to get the newly selected number from picker.
Steps and Source code for implementing NumberPicker:
– First Create a new Project NumberPickerExample.
– Create an empty activity i.e MainActivity.
– Now add NumberPicker to your Activity layout file
activity_main.xml file:
<?xml version="1.0" encoding="utf-8"?>
<RelativeLayout xmlns:android="http://schemas.android.com/apk/res/android"
xmlns:app="http://schemas.android.com/apk/res-auto"
xmlns:tools="http://schemas.android.com/tools"
android:layout_width="match_parent"
android:layout_height="match_parent"
tools:context="com.sanktips.numberpickerexample.MainActivity">

<TextView
android:id="@+id/selectNumber"
android:text="Pick Number ..."
android:textSize="18sp"
android:gravity="center"
android:layout_margin="16dp"
android:layout_width="match_parent"
android:layout_height="wrap_content" />

<NumberPicker
android:id="@+id/numPicker"
android:layout_margin="16dp"
android:layout_centerHorizontal="true"
android:layout_below="@+id/selectNumber"
android:layout_width="wrap_content"
android:layout_height="wrap_content"/>

<View
android:id="@+id/lineBtn"
android:layout_below="@+id/numPicker"
android:layout_width="match_parent"
android:layout_height="2dp"
android:background="#f2f2f2" />

<TextView
android:id="@+id/selectText"
android:text="Pick Value ... "
android:textSize="18sp"
android:gravity="center"
android:layout_below="@+id/lineBtn"
android:layout_margin="16dp"
android:layout_width="match_parent"
android:layout_height="wrap_content" />

<NumberPicker
android:id="@+id/txtPicker"
android:layout_margin="16dp"
android:layout_centerHorizontal="true"
android:layout_below="@+id/selectText"
android:layout_width="wrap_content"
android:layout_height="wrap_content"/>

</RelativeLayout>
– Then we will set the setOnValueChangedListener into our MainActivity class to get value that user have selected.
MainActivity.java file:
package com.sanktips.numberpickerexample;

import android.support.v7.app.AppCompatActivity;
import android.os.Bundle;
import android.widget.NumberPicker;
import android.widget.TextView;


public class MainActivity extends AppCompatActivity {


    TextView selectedNum, selectedTxt;
    NumberPicker numberPicker, textPicker;


    @Override
    protected void onCreate(Bundle savedInstanceState) {
        super.onCreate(savedInstanceState);
        setContentView(R.layout.activity_main);


        selectedNum = (TextView) findViewById(R.id.selectNumber);
        selectedTxt = (TextView) findViewById(R.id.selectText);
        numberPicker = (NumberPicker) findViewById(R.id.numPicker);
        textPicker = (NumberPicker) findViewById(R.id.txtPicker);


	//Populate NumberPicker values from minimum and maximum value range
        numberPicker.setMinValue(0);
        numberPicker.setMaxValue(10);
        numberPicker.setWrapSelectorWheel(true);

        numberPicker.setOnValueChangedListener(new NumberPicker.OnValueChangeListener() {
            @Override
            public void onValueChange(NumberPicker numberPicker, int i, int i1) {

                selectedNum.setText("Selected Number : "+i1);

            }
        });


	//Populate NumberPicker values from String array values
        final String[] values= {"Cupcake","Donut", "Eclair", "Froyo", "Gingerbread", "Honeycomb", "JellyBean", "Kitkat", "Lollipop", "Marshmallow", "Nougat", "Oreo"};

        textPicker.setMinValue(0);
        textPicker.setMaxValue(values.length-1);
        textPicker.setDisplayedValues(values);
        textPicker.setWrapSelectorWheel(true);

        textPicker.setOnValueChangedListener(new NumberPicker.OnValueChangeListener() {
            @Override
            public void onValueChange(NumberPicker numberPicker, int i, int i1) {

                selectedTxt.setText("Selected Text : "+values[i1]);

            }
        });

    }

}
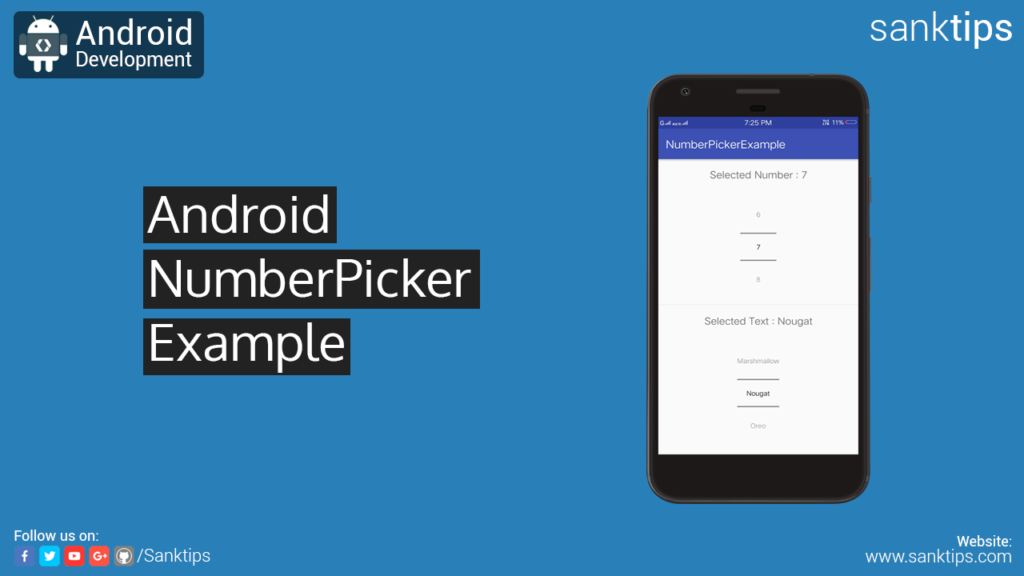
– So, we are done with the implementation of NumberPicker. Run the project to see the result.
Hope you find this article helpful. Join us on Facebook, Twitter and Google+ to get more updates on Android Development Tutorials.